實驗說明:
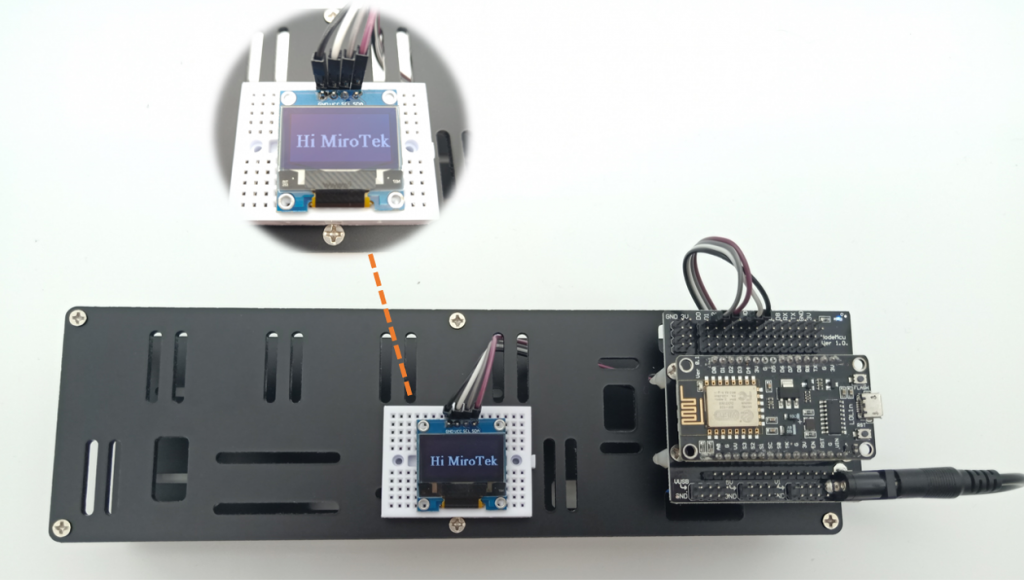
- MAX7219 8X8點矩陣顯示模組是已經整合MAX7219 IC 與Led Matrix點矩陣顯示面板,在Arduino使用上真的非常方便,不用接一堆線和電阻,還有現成的函式庫可用,程式好寫,輕鬆簡單就能顯示出各種文字、圖型,甚至是動畫。本範例將介紹MAX7219 與Arduino的使用方式。
▼購買MAX7219 8X8點矩陣顯示模組:
材料:
- Arduino Uno R3
- USB 傳輸線
- MAX7219 點矩陣顯示模組
- 杜邦線
安裝 LedControl 程式庫
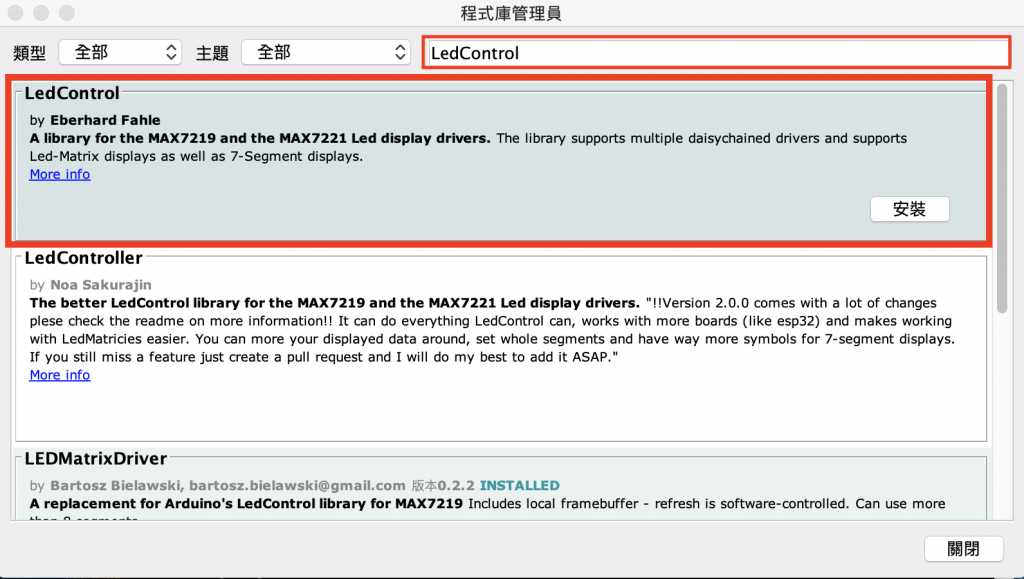
- 在 Arduino 整合環境功能表點選 草稿碼 / 匯入程式庫 / 管理程式庫
- 在右上方搜尋框輸入「LedControl」,下方會列出所有符合條件的程式庫,不同程式庫使用的程式碼並不相同。此處點 選「LedControl」,該項目右下角會出現「安裝」鈕,按「安裝」鈕開始安裝。
程式:
#include <LedControl.h>
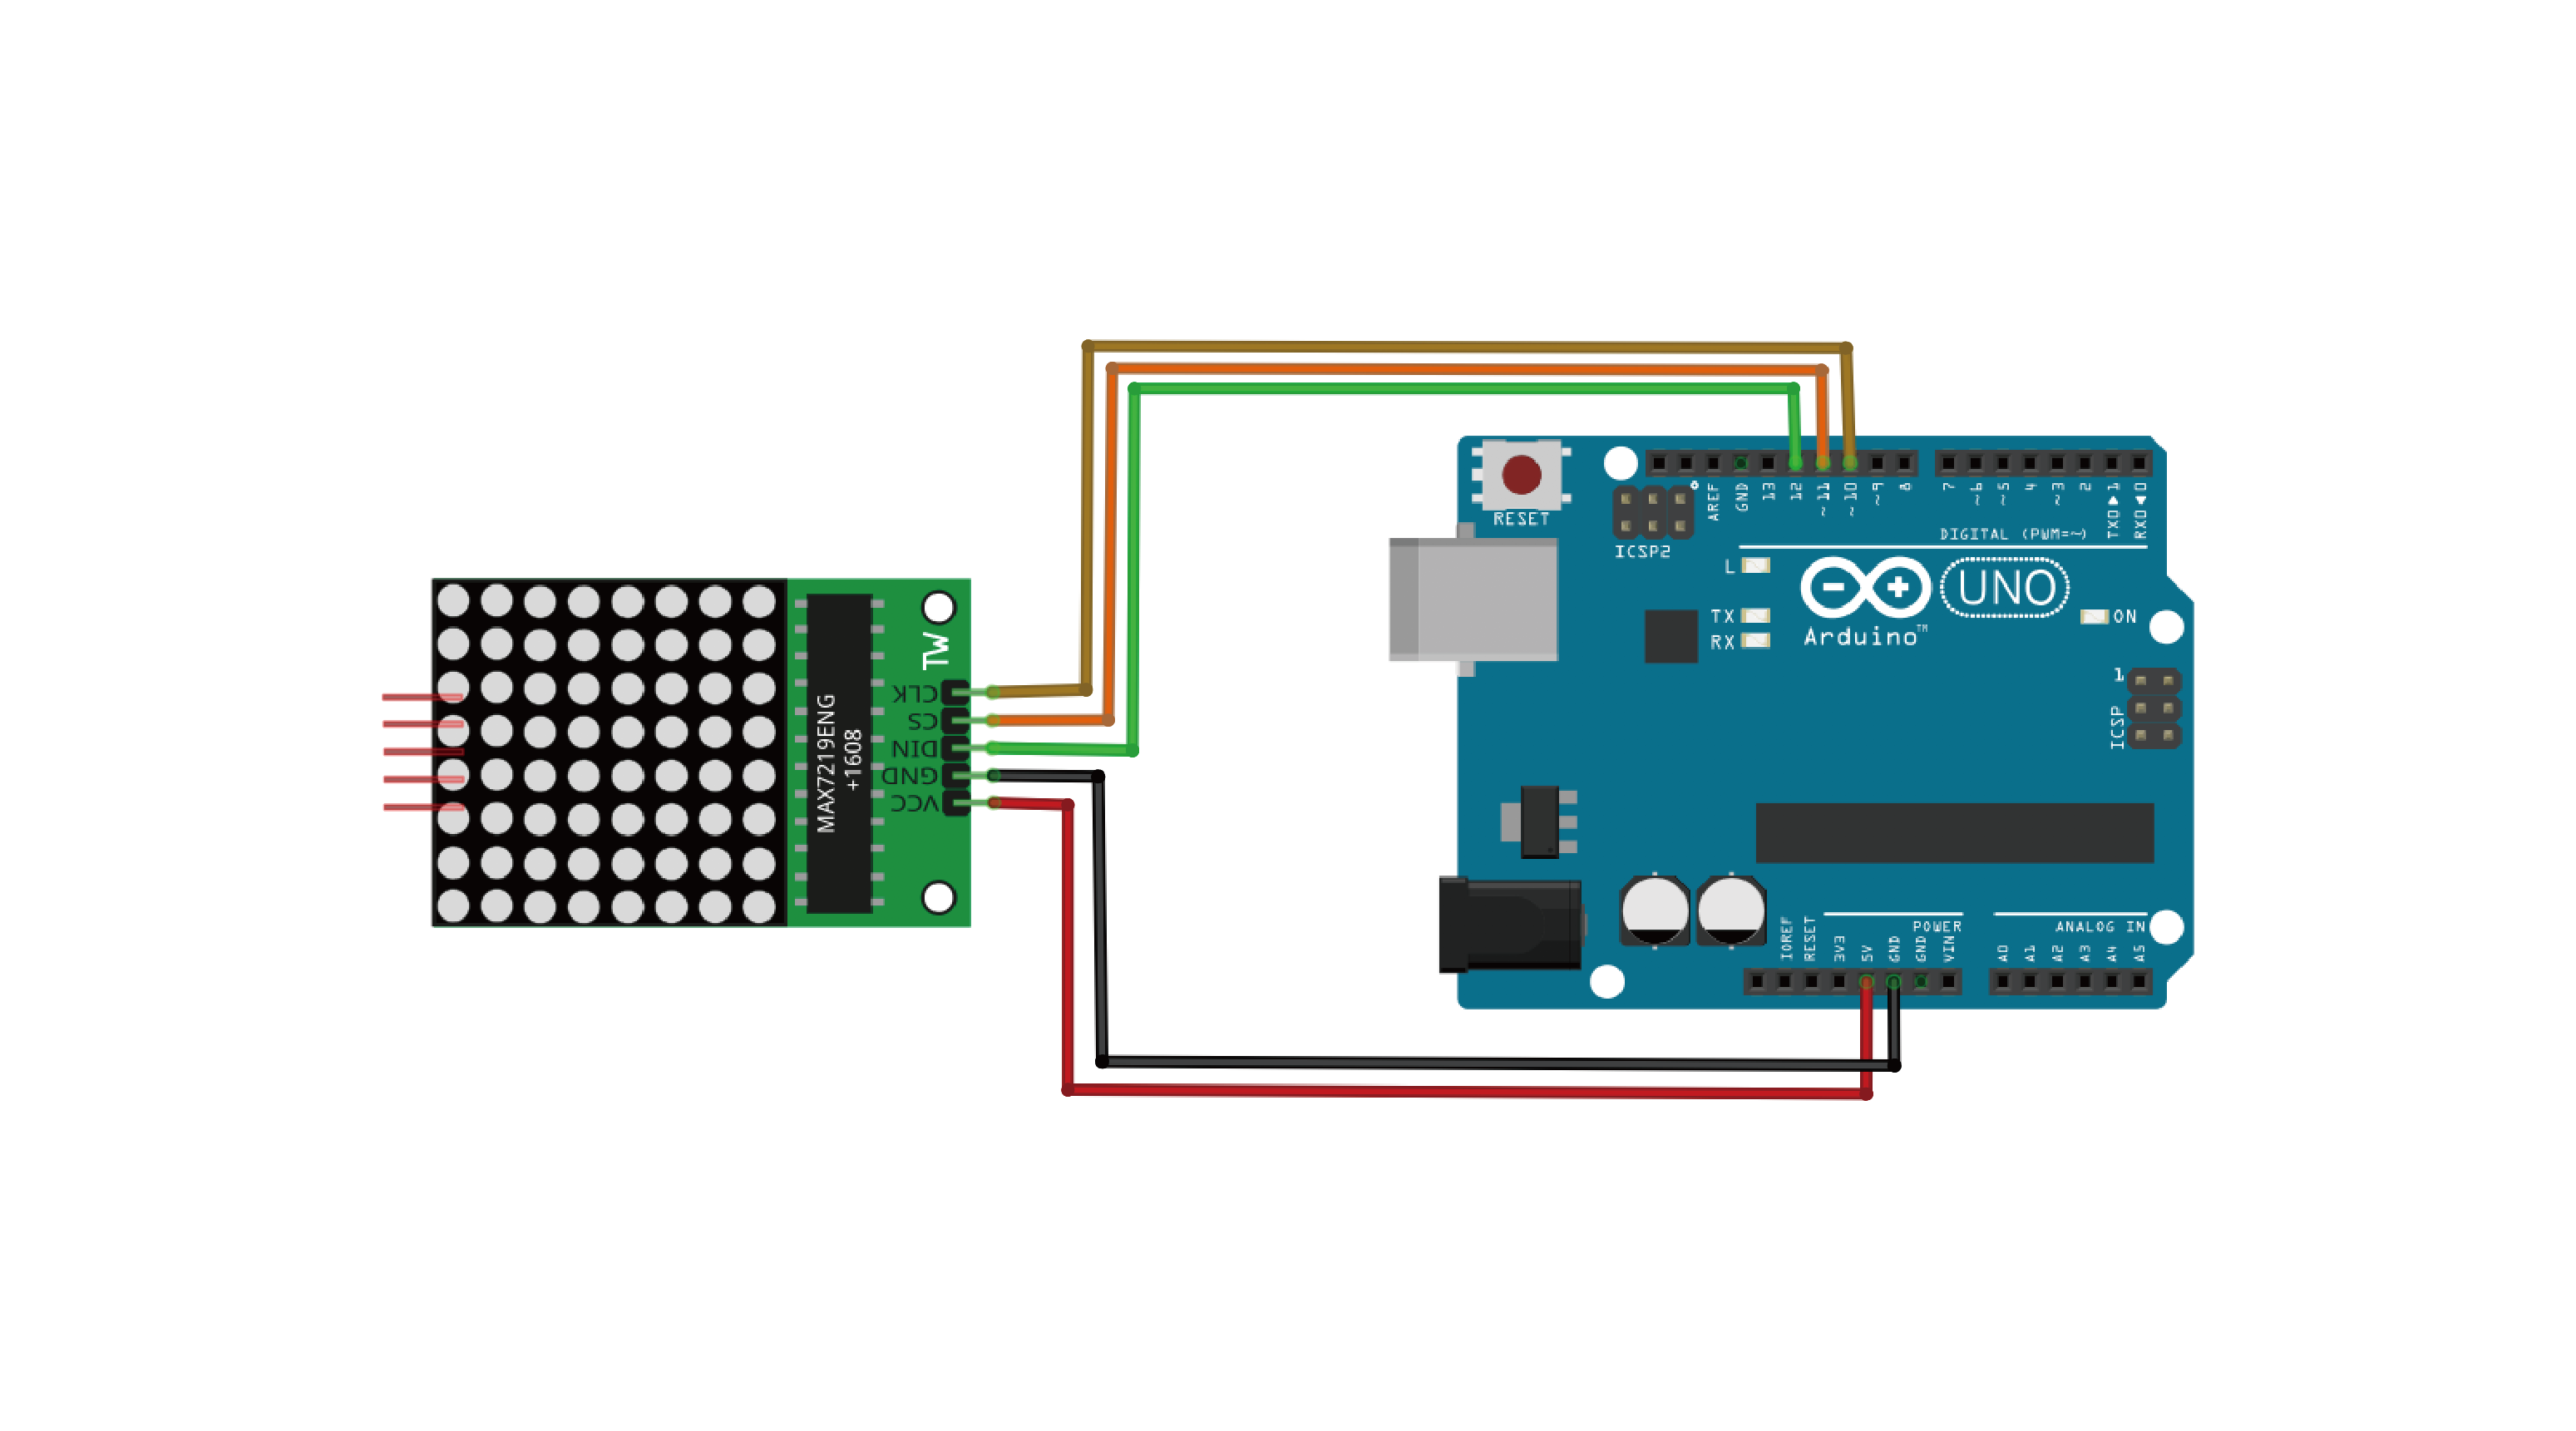
int DIN = 12;
int CS = 11;
int CLK = 10;
byte m[8]= {0xE7,0xFF,0xFF,0xDB,0xDB,0xDB,0xC3,0xC3}; //英文字母m
byte i[8]= {0x00,0x10,0x00,0x10,0x10,0x10,0x10,0x10}; //英文字母i
byte r[8]= {0x00,0x00,0x2c,0x32,0x20,0x20,0x20,0x20}; //英文字母r
byte o[8]= {0x00,0x00,0x1c,0x22,0x22,0x22,0x22,0x1c}; //英文字母o
byte t[8]= {0x00,0x00,0x10,0x7e,0x10,0x10,0x14,0x18}; //英文字母t
byte e[8]= {0x00,0x3c,0x42,0x42,0x7e,0x40,0x40,0x3e}; //英文字母e
byte k[8]= {0x00,0x20,0x20,0x24,0x28,0x30,0x28,0x24}; //英文字母k
byte smile[8]= {0x3C,0x42,0xA5,0x81,0xA5,0x99,0x42,0x3C}; //微笑
byte love_1[8]= {0x00,0x66,0x99,0x81,0x42,0x24,0x18,0x00}; //愛心-1
byte love_2[8]= {0x00,0x66,0xff,0xff,0x7e,0x3c,0x18,0x00}; //愛心-2
byte Front[8]= {0x08,0x1c,0x3e,0x7f,0x1c,0x1c,0x1c,0x1c}; //前
byte back[8]= {0x1c,0x1c,0x1c,0x1c,0x7f,0x3e,0x1c,0x08}; //後
byte left[8]= {0x10,0x30,0x7f,0xff,0x7f,0x30,0x10,0x00}; //左
byte right[8]= {0x08,0x0c,0xfe,0xff,0xfe,0x0c,0x08,0x00}; //右
LedControl lc=LedControl(DIN,CLK,CS,0);
void setup(){
lc.shutdown(0,false); //The MAX72XX is in power-saving mode on startup
lc.setIntensity(0,15); // Set the brightness to maximum value
lc.clearDisplay(0); // and clear the display
}
void loop(){
printByte(smile);
delay(1000);
printByte(love_1);
delay(1000);
printByte(love_2);
delay(1000);
printByte(Front);
delay(1000);
printByte(back);
delay(1000);
printByte(left);
delay(1000);
printByte(right);
delay(1000);
printLetter();
lc.clearDisplay(0);
delay(1000);
}
void printLetter()
{
printByte(m);
delay(1000);
printByte(i);
delay(1000);
printByte(r);
delay(1000);
printByte(o);
delay(1000);
printByte(t);
delay(1000);
printByte(e);
delay(1000);
printByte(k);
delay(1000);
}
void printByte(byte character [])
{
int i = 0;
for(i=0;i<8;i++)
{
lc.setRow(0,i,character[i]);
}
}
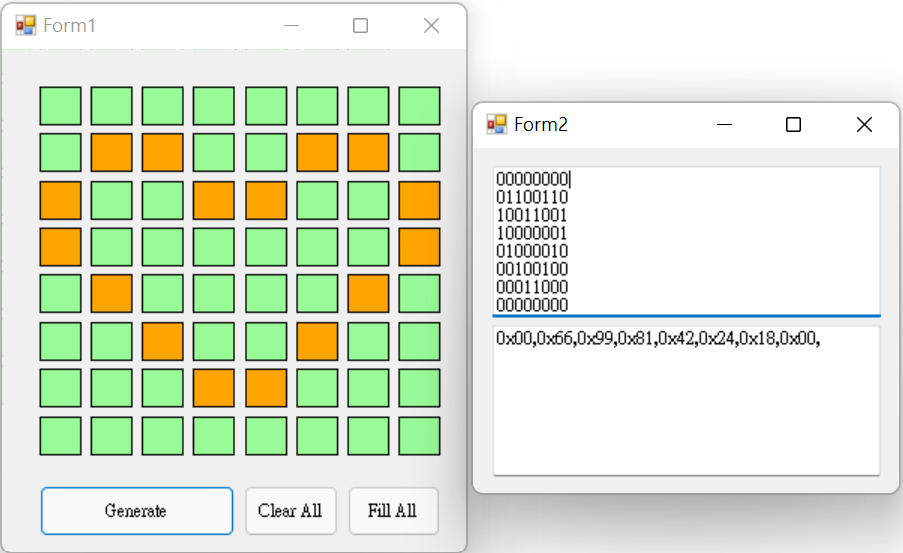
超簡單的LED Matrix圖形編輯工具:
- 在我們編寫LED Matrix程式之前,先跟各位介紹一下PixeltoMatrix圖形編輯工具, PixeltoMatrix編輯的結果可以產生 Arduino 16 進位或 2 進位的動畫程式碼。
- PixeltoMatrix編輯工具:下載
▼執行PixelToMatrix.exe就可開始繪製圖型,繪製完成後點擊「Generate」,將會自動產生16 進位或 2 進位的代碼,您可將此代碼加入您的程式中,如上面程式範例第16行「愛心-1」。