實驗說明:
門禁系統普遍像是RFID、輸入密碼、指紋辨識、人臉辨識‧‧‧ 等等。現在,我們將學習使用RFID(射頻識別)無線通信技術。
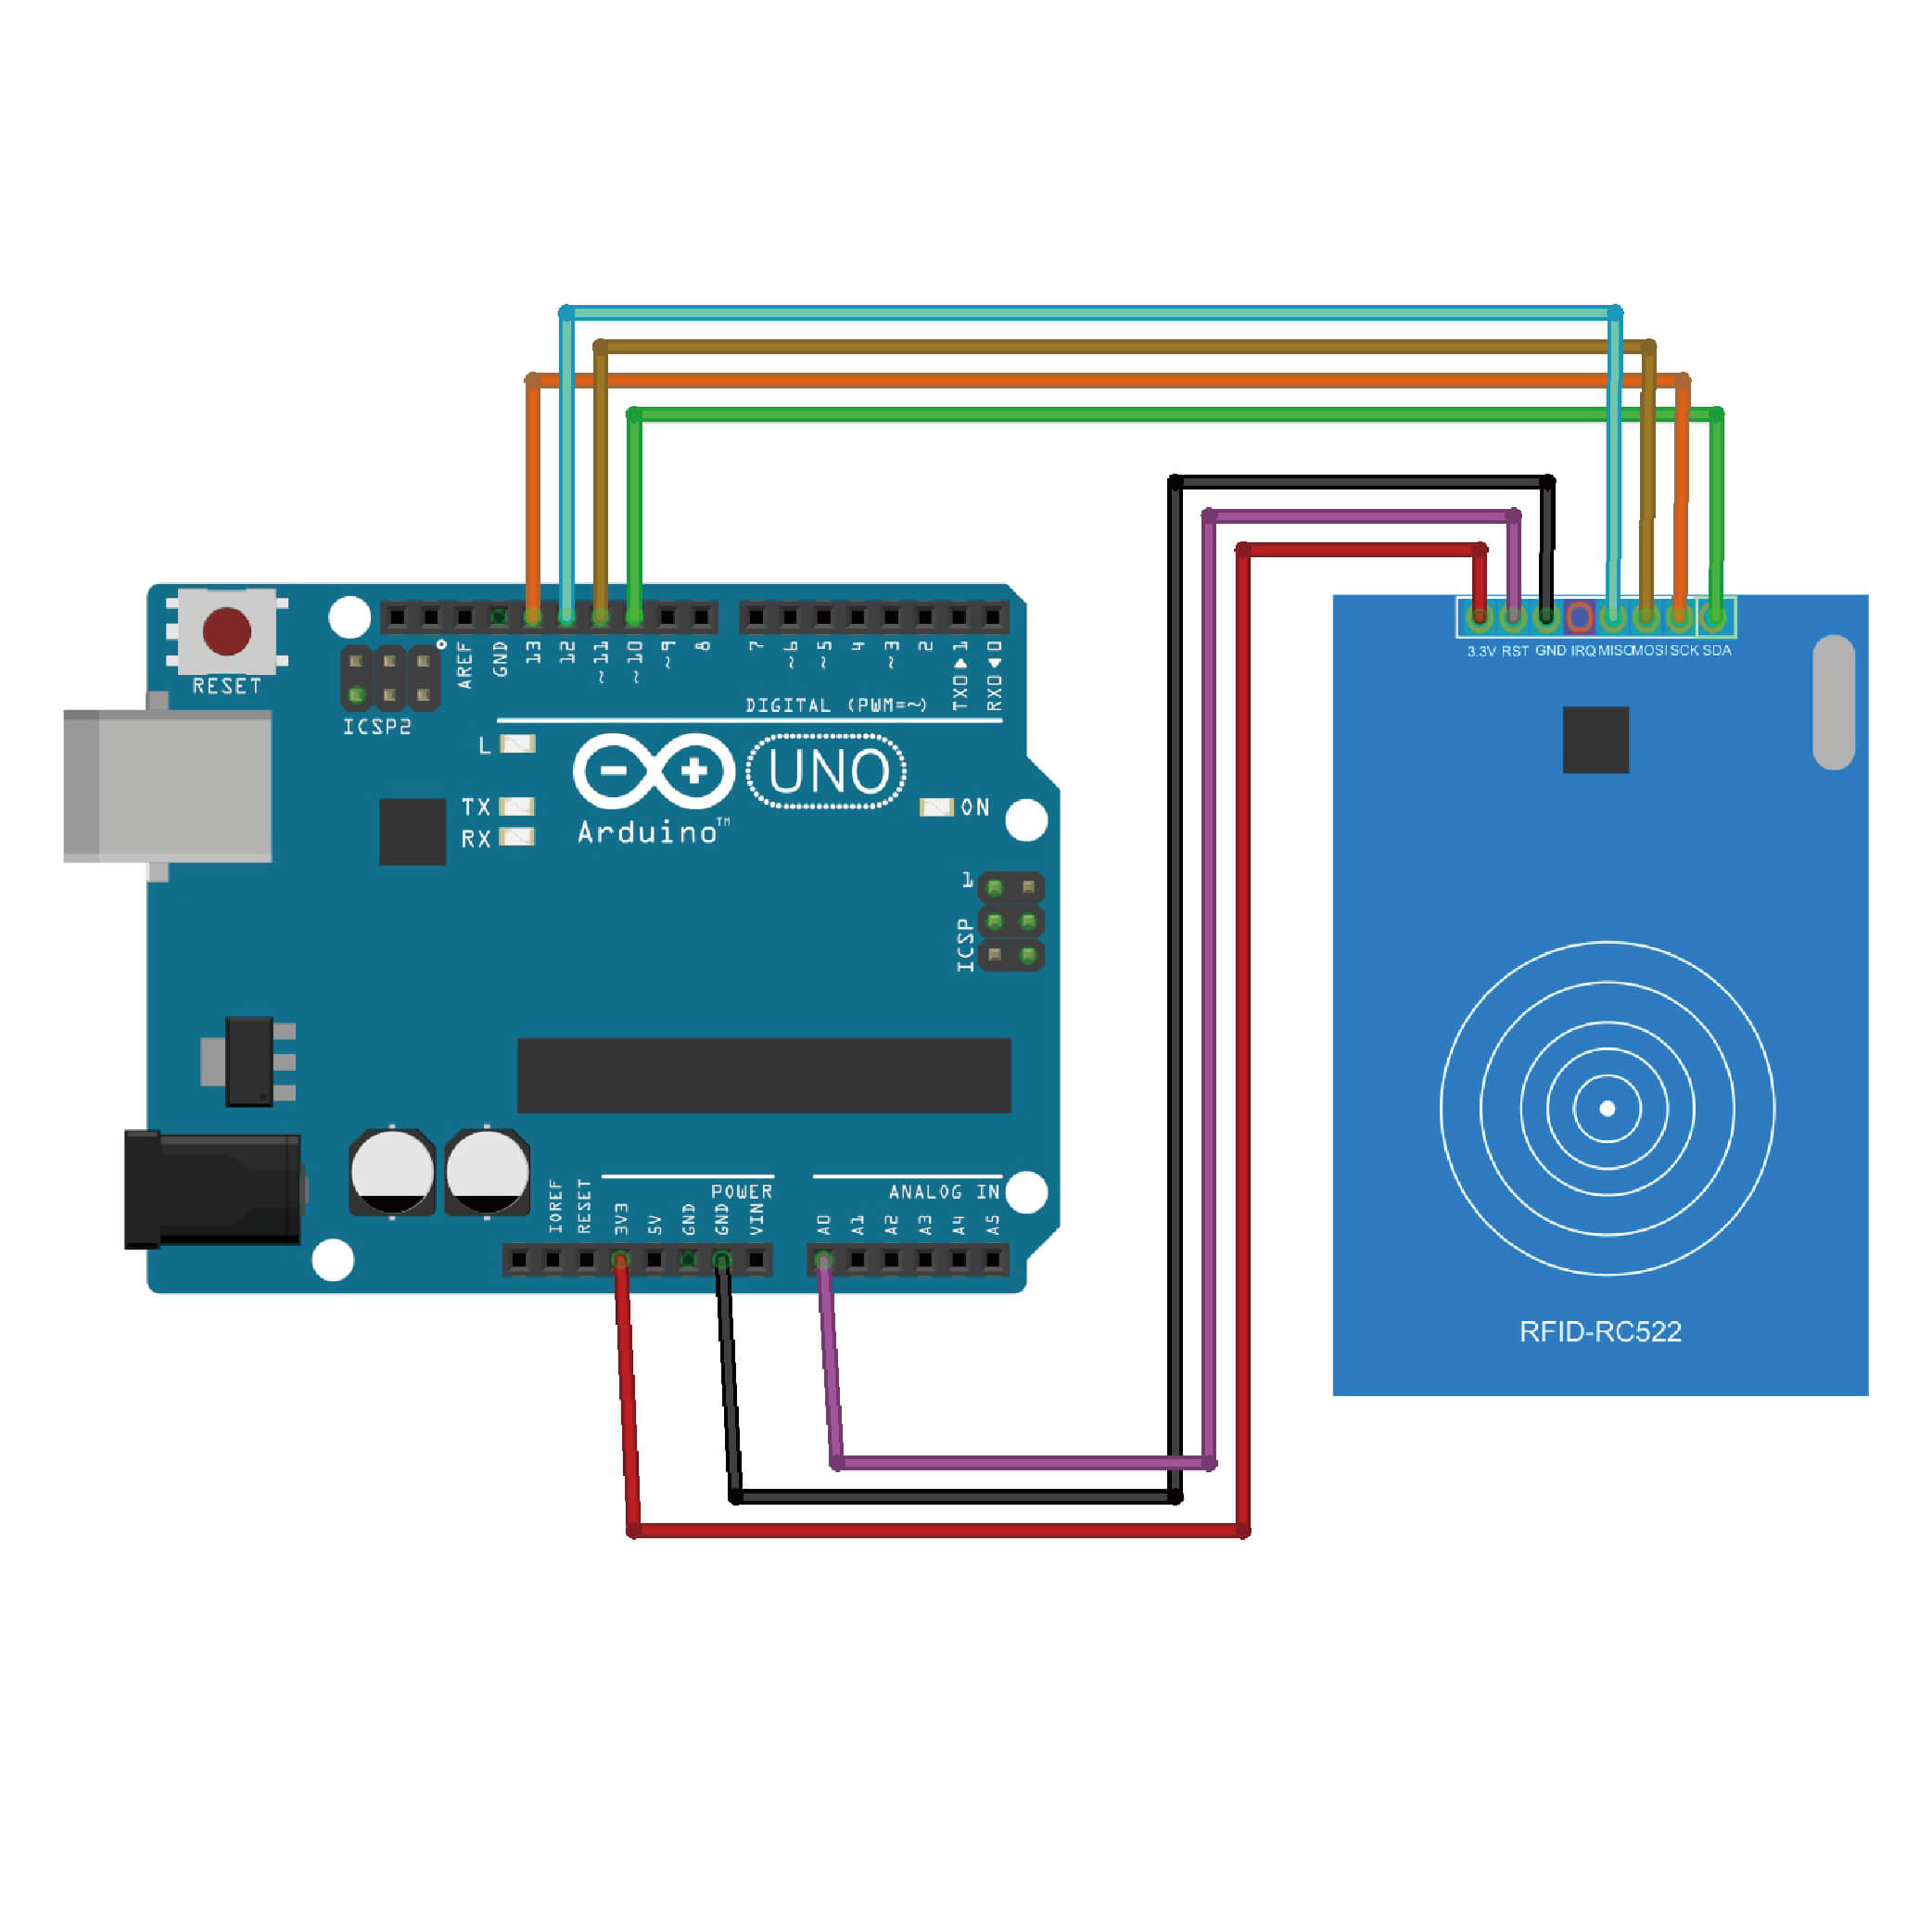
在這個篇專案中,我們將讀取RFID卡的唯一ID號(UID),識別RFID卡的類型並通過序列埠視窗顯示卡片資訊。
材料:
- Arduino Uno R3
- USB 傳輸線
- RFID RC522模組
- 麵包板
安裝 MFRC522 程式庫
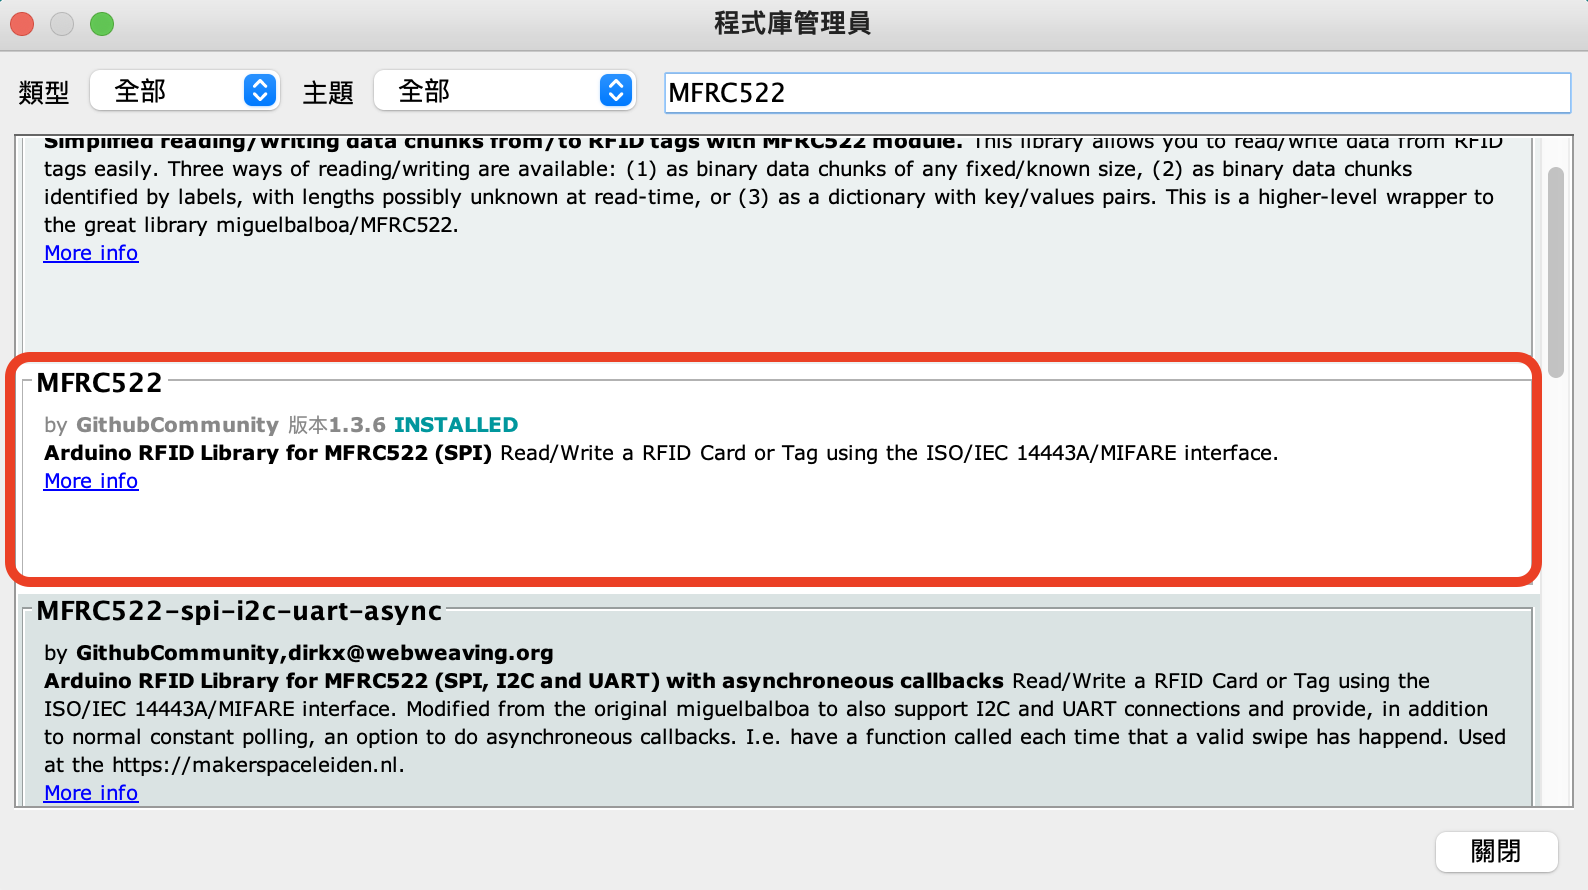
- 在 Arduino 整合環境功能表點選 草稿碼 / 匯入程式庫 / 管理程式庫。
- 在右上方搜尋框輸入「MFRC522」,下方會列出所有符合條件的程式庫,不同程式庫使用的程式碼並不相同。此處點選「MFRC522」請選擇「1.3.6版本」,該項目右下角會出現「安裝」鈕,按「安裝」鈕開始安裝。
程式:
#include <SPI.h>
#include <MFRC522.h>

#define RST_PIN         A0          // Configurable, see typical pin layout above
#define SS_PIN          10         // Configurable, see typical pin layout above

MFRC522 mfrc522(SS_PIN, RST_PIN);  // Create MFRC522 instance

void setup() {
	Serial.begin(9600);		// Initialize serial communications with the PC
	while (!Serial);		// Do nothing if no serial port is opened (added for Arduinos based on ATMEGA32U4)
	SPI.begin();			// Init SPI bus
	mfrc522.PCD_Init();		// Init MFRC522
	delay(4);				// Optional delay. Some board do need more time after init to be ready, see Readme
	Serial.println(F("Scan PICC to see UID, SAK, type, and data blocks..."));
}

void loop() {
	// Reset the loop if no new card present on the sensor/reader. This saves the entire process when idle.
	if ( ! mfrc522.PICC_IsNewCardPresent()) {
		return;
	}

	// Select one of the cards
	if ( ! mfrc522.PICC_ReadCardSerial()) {
		return;
	}

	// Dump debug info about the card; PICC_HaltA() is automatically called
	mfrc522.PICC_DumpToSerial(&(mfrc522.uid));
}
▼ 下載程序完成後,將白卡靠近RFID-RC522模組,序列埠監視器將打印出白卡的所有資訊(Card UID、type、Sector Block …等等)


